
Call OpenAI API Remotely by VSCode
2024-02-19
Because OpenAI API is unavailable in China, it's difficult to develop using OpenAI API in China.
If you have an abroad Linux server which can access OpenAI api, you can use VS Code's remote ssh extension to use the server as your development enviroment. This can greatly simplify your development using the API.
If you don't have an abroad server, you can get a free server with some cloud computing providers. There are many articles of how to get it, so we won't discuss it here.
For it's easy to use Linux as a server, the following contents are all based on Linux server.
1. Setup login method of the server
Currently, mostly of the cloud computing providers will provide login by ssh key method when initializing the server. The key pair is made up of two parts, the public key which is saved on the server, and the private key which is saved on your client machine. For this example, we save the private key as C:\work\server.pem.
If the login method of the server is setup to using username and password, we can add key pair ourself. Using key pair to login to the server is more secure than using username and password.
1. Generate key pair: we can use ssh-keygen command on the server to generate key pair. The options may all be passed by, using default options is ok, we can adjust them later.
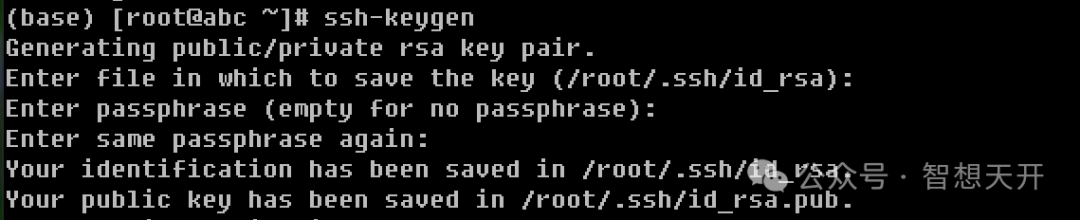
2. Save private key: goto the directory displayed in the above step, /root/.ssh, then execute command `cat id_rsa`, copy the content, save it to C:\work\server.pem, this is the private key. Then we must delete it from the server, to keep the key secret.
3. Save public key: using command `cat id_rsa.pub >> authorized_keys, to add the content of id_rsa.pub to the server's keys and finish the setup of the key pair. Then you can also delete id_rsa.pub from the server, for it's no use now.

If your working machine is Linux or Mac, the above steps are all the same. The only different is the local path of C:\work. We'll using Windows in the following steps for example.
2. Setup client to connect to server using private key
Open a new command window in your working machine, execute command `ssh -i server.pem root@server` to test whether you can connect to the server. Here, please change root@server to your actual username and server's ip, such as user@ip.
For the first time connecting to the server, it may display server's fingerprint, just answer yes to save it to your machine so it won't ask you again.
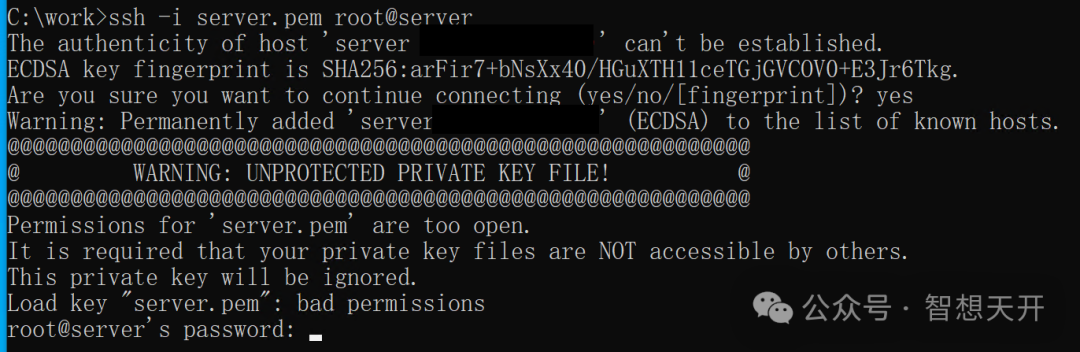
If the permissions of the private key file are too open, ssh will refuse to use the key file, and still ask we to provide username and password to login to the server. We should stop execute by CTRL+C and change permissions of the file before we use it.
If your machine is Linux or Mac, it's easy to change the permissions by use the following command `chmod 400 server.pem`. If is Windows, please follow the next steps.
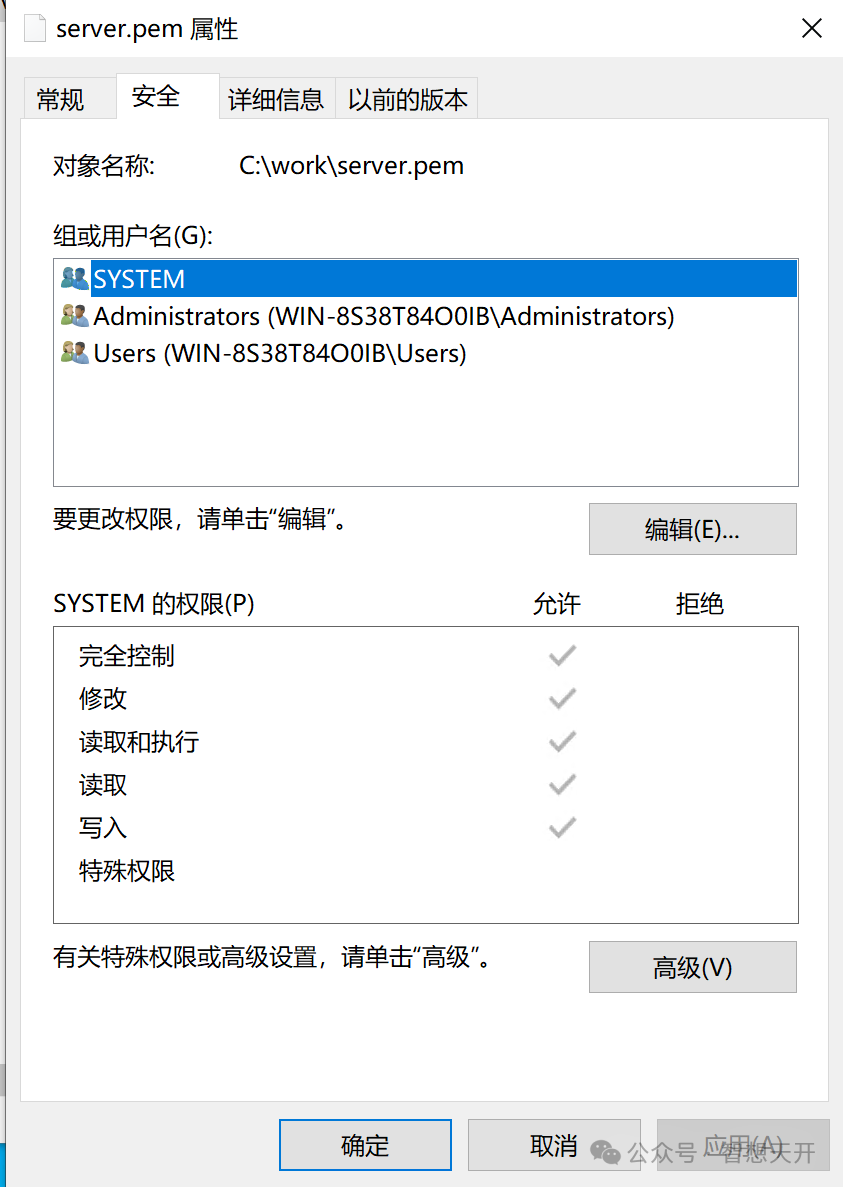
1. Right click on server.pem, select Properties, then enter Security tab.
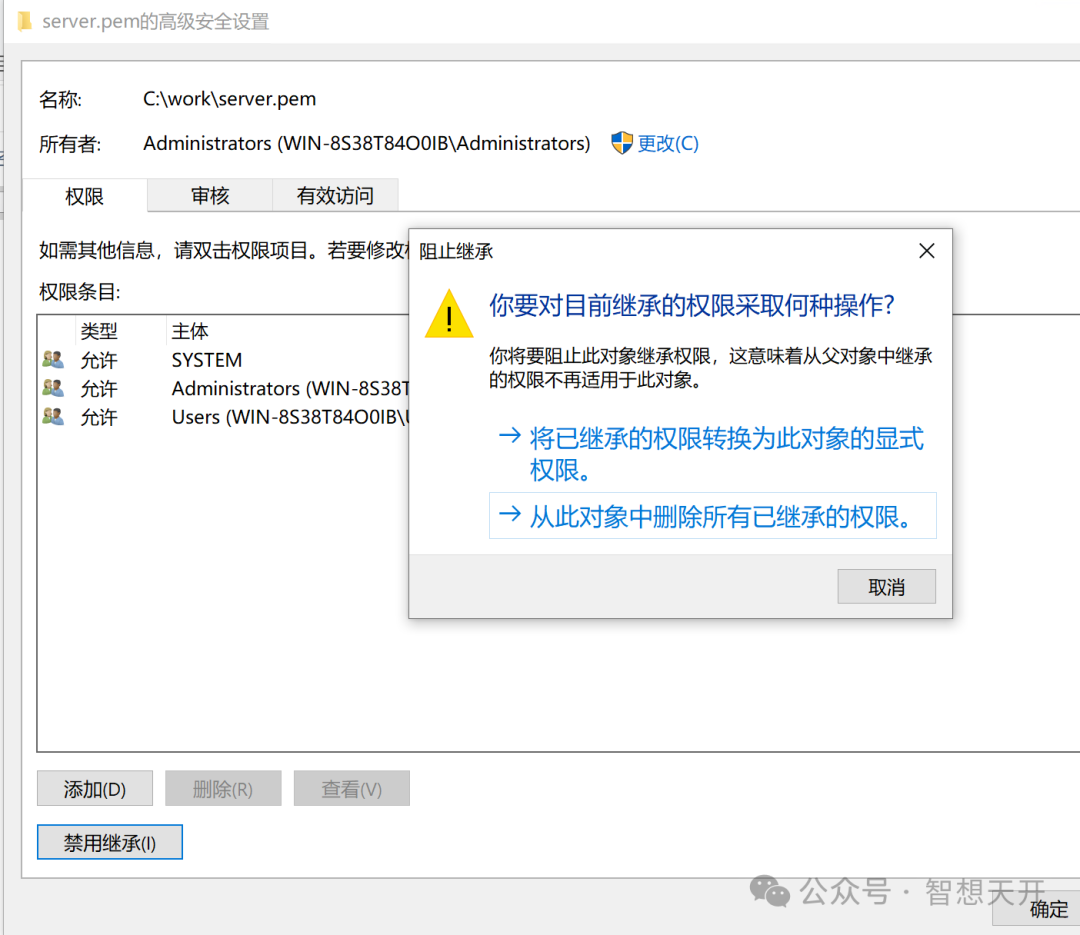
2. At Security tab, enter Advanced settings.
3. At Advanced settings, stop inherit from parent and remove all inheritted permissions.
4. Add new permissons. At select user or group dialog, enter your logged user name at the input box, for example, it's Administrator for my machine. The username entered must be exactly the same with the name you used to login.
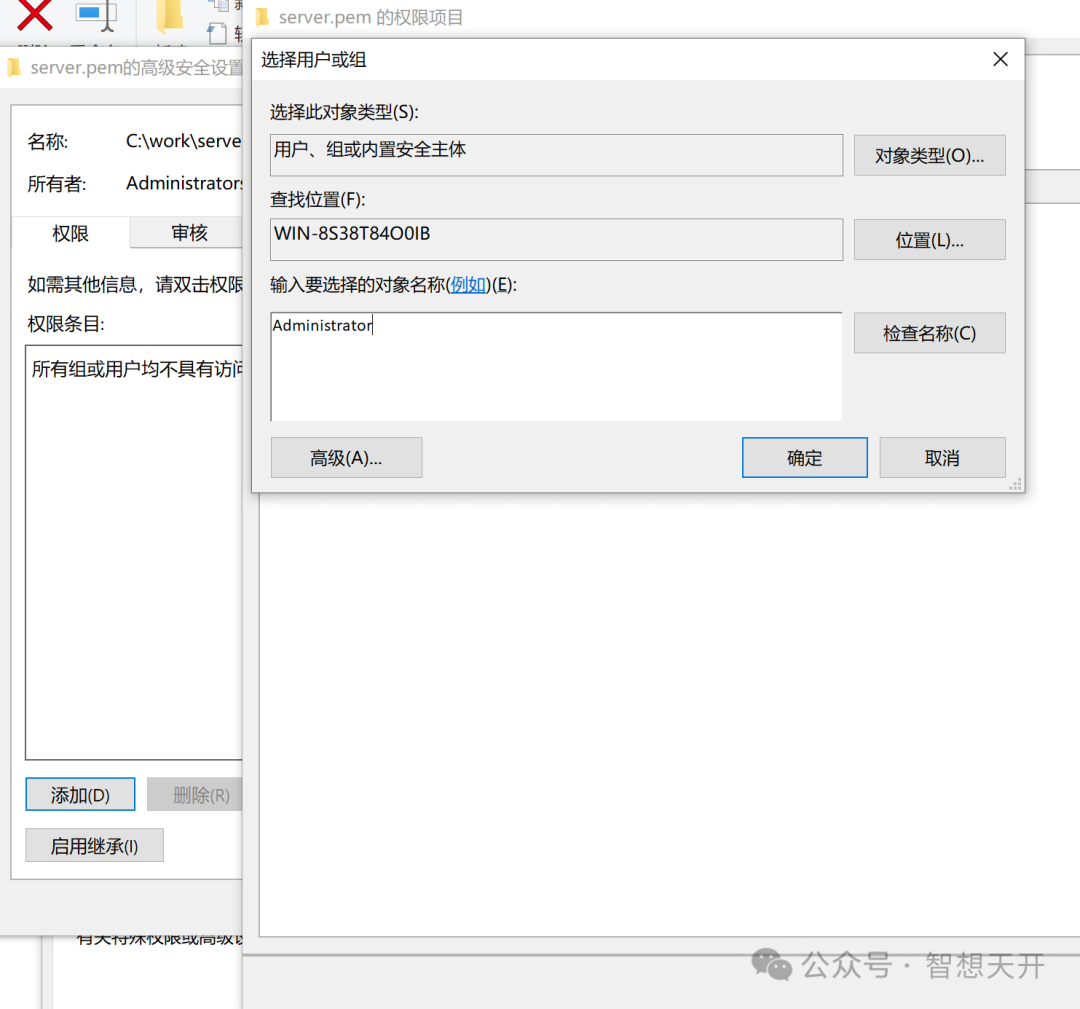
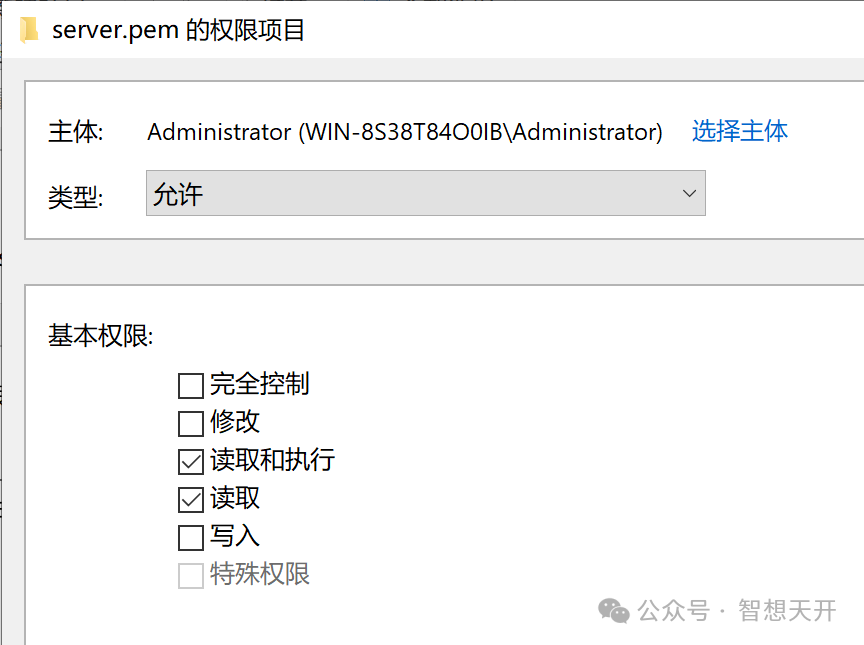
5. Allow the selected user read permission is enough.
6. Execute `ssh -i server.pem root@server` again, this time we should be allowed to login to the server.

3. Using VS Code to connect to the server
After we can connect to the server using command line, we can setup VS Code to connect to the server now.
1. Open VS Code, and click the connection to server icon at the left bottom corner.

2. A dialg appears, whether we choose the first option, connect to host, or the second option, connect current window to host, are all ok.

3. Then we add new SSH host.

4. At the command dialog, we use the same command as we used in the previous step. Notice: when using Windows, the path seperator should be `/`, not `\`, so the previous command should be as this: `ssh -i c:/work/server.pem root@server`.

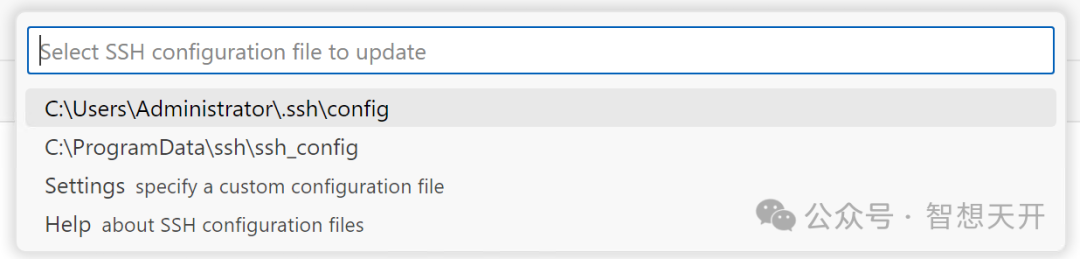
5. Press enter, and it will ask us where to save the configuration. We use the first option, save it to current user's configuration file, not the global file.
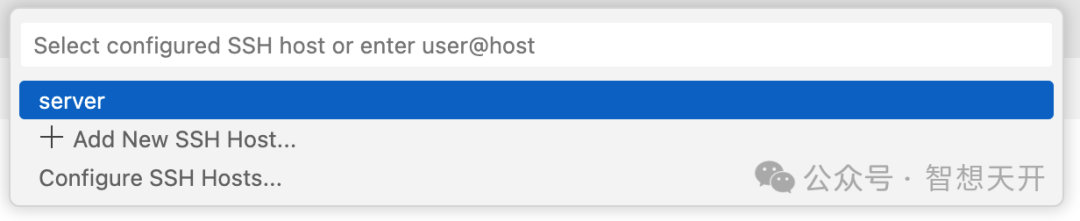
6. When we click the icon at the left bottom again, it shows the server we added just now. We can click on the server's name to connect to is.

4. Setup environment for development
After connected to remote server, we can setup development environment within VS Code.
1. Click Open Folder to open a remote folder, all developments will be under the folder.

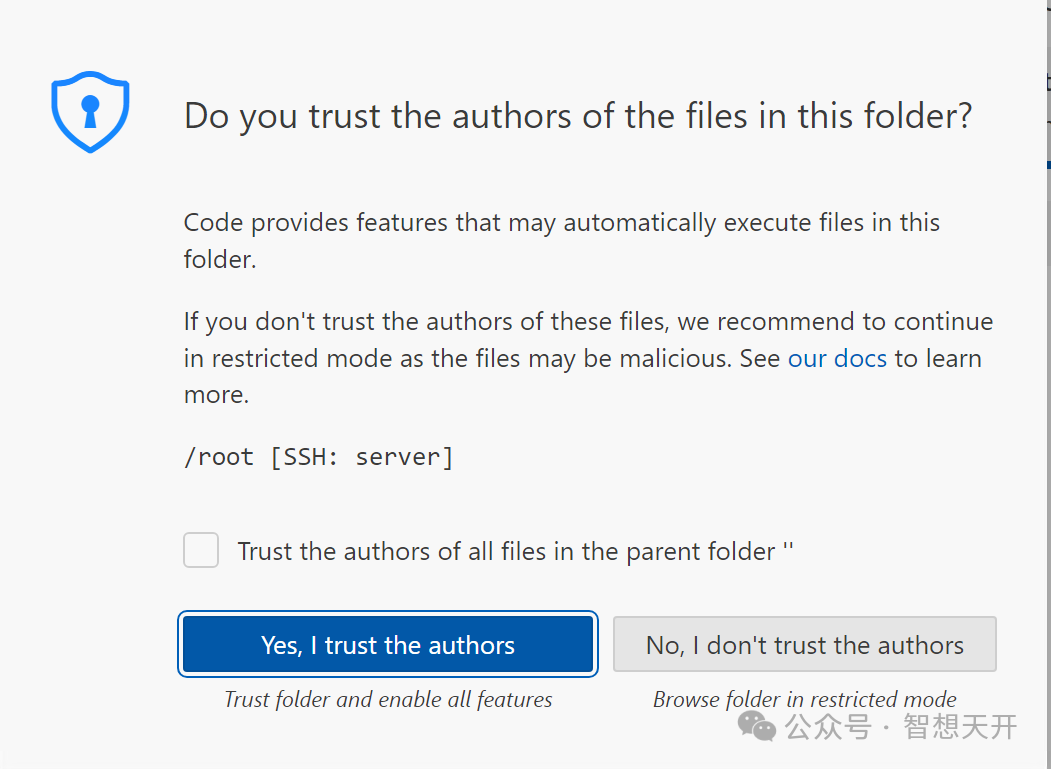
2. For the first time to use the folder, VS Code may ask we whether to trust the folder, we can check trust all to stop it ask us again.
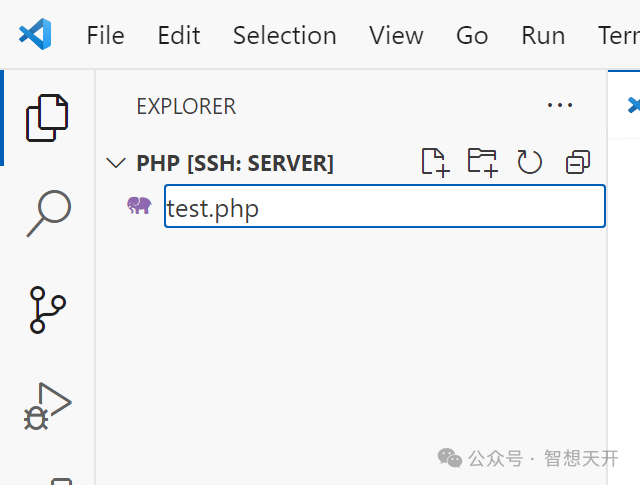
3. Then we can use explorer icon at top left of VS Code to create folders and files on the server, the same as we use to develop on the client machine.

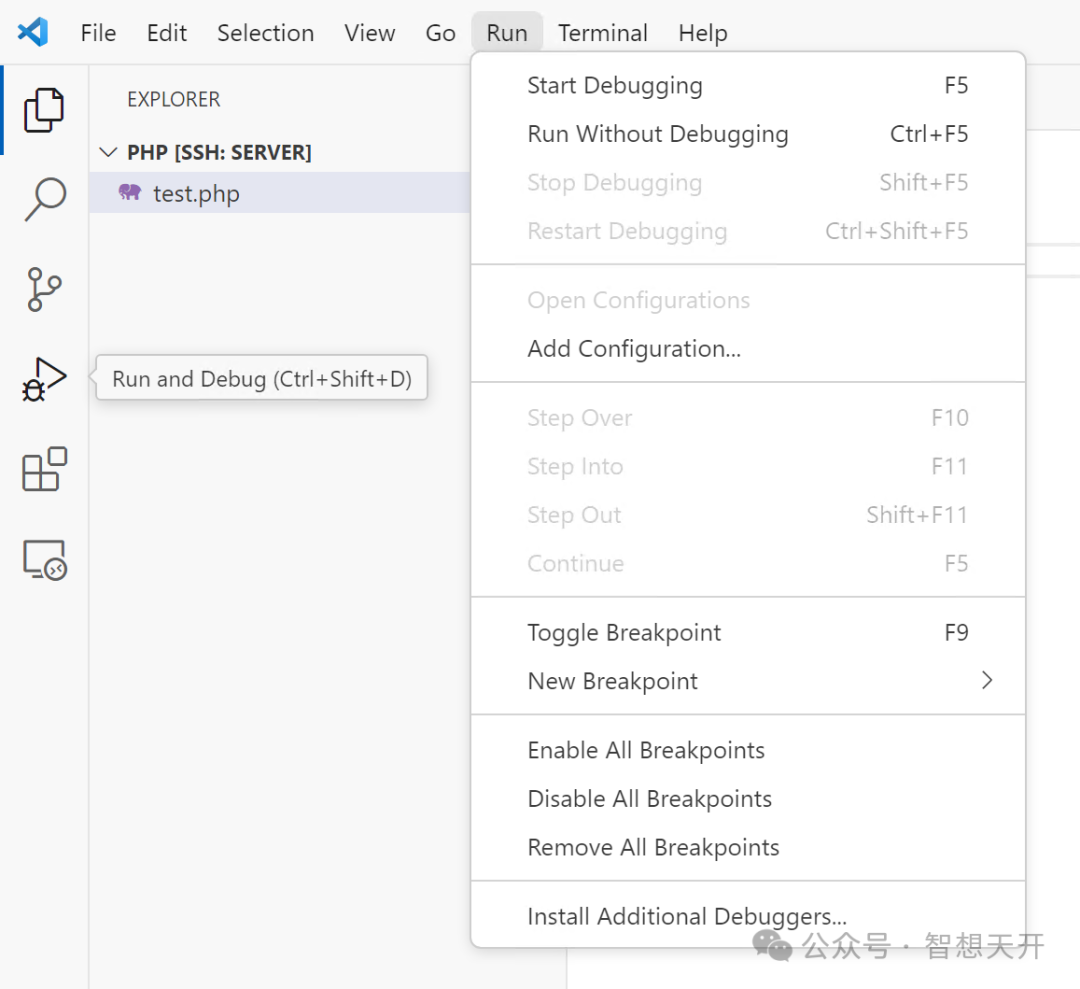
4. For example, we created a test.php, and added `echo "hello, world";` to it. Then we click the run icon on the left toolbar, or using Start Debugging at Run menu.
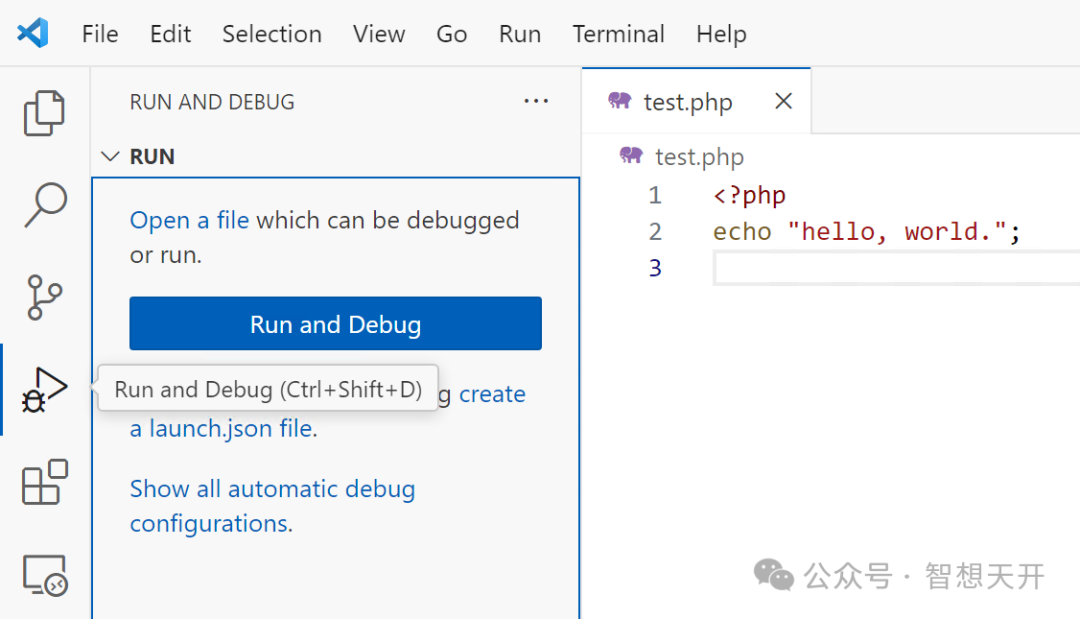
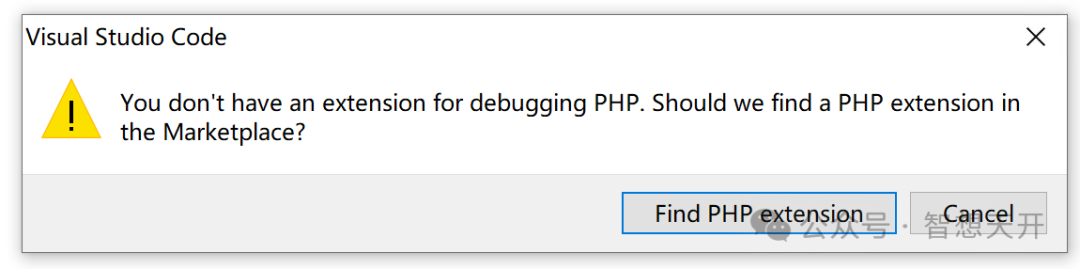
5. If it says no debug extension found, just click the Find button, it will find applicable extensions for us automatically.
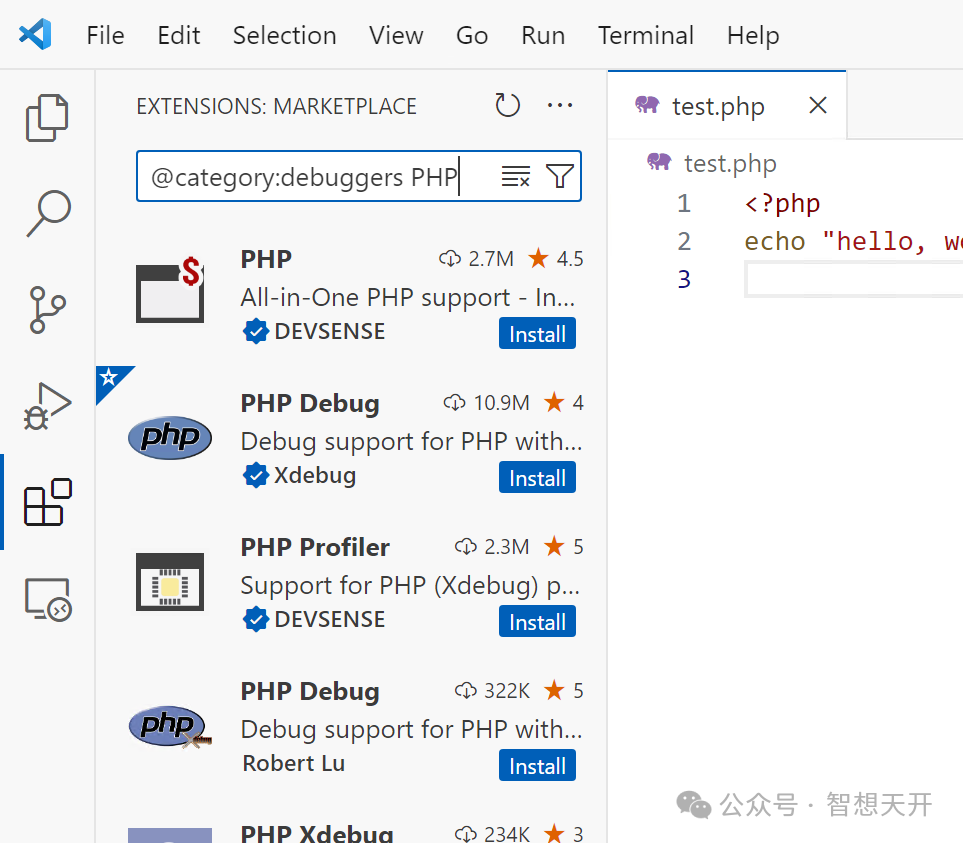
6. We use PHP Debug provided by XDebug. Click Install, then VS Code will install all files needed onto the server. The next time or when we changed a client machine, it can be used directly without install again.
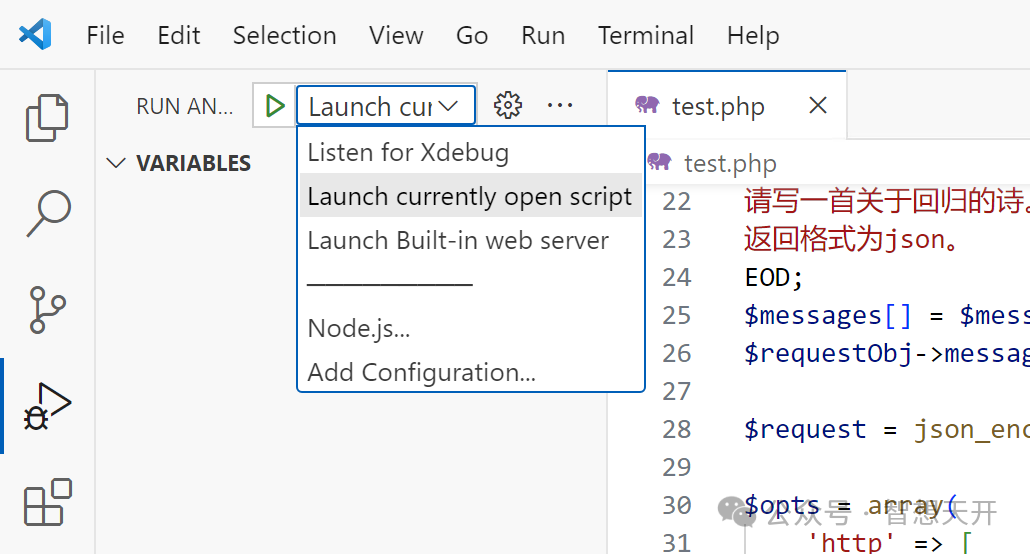
7. After extension install finished, we click run again, an option list will be shown, we should choose Launch currently open script to run the test.php file.
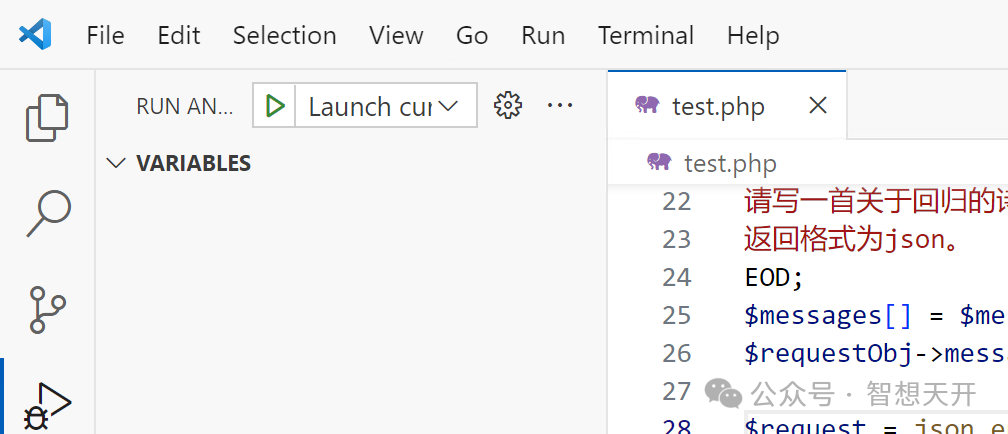
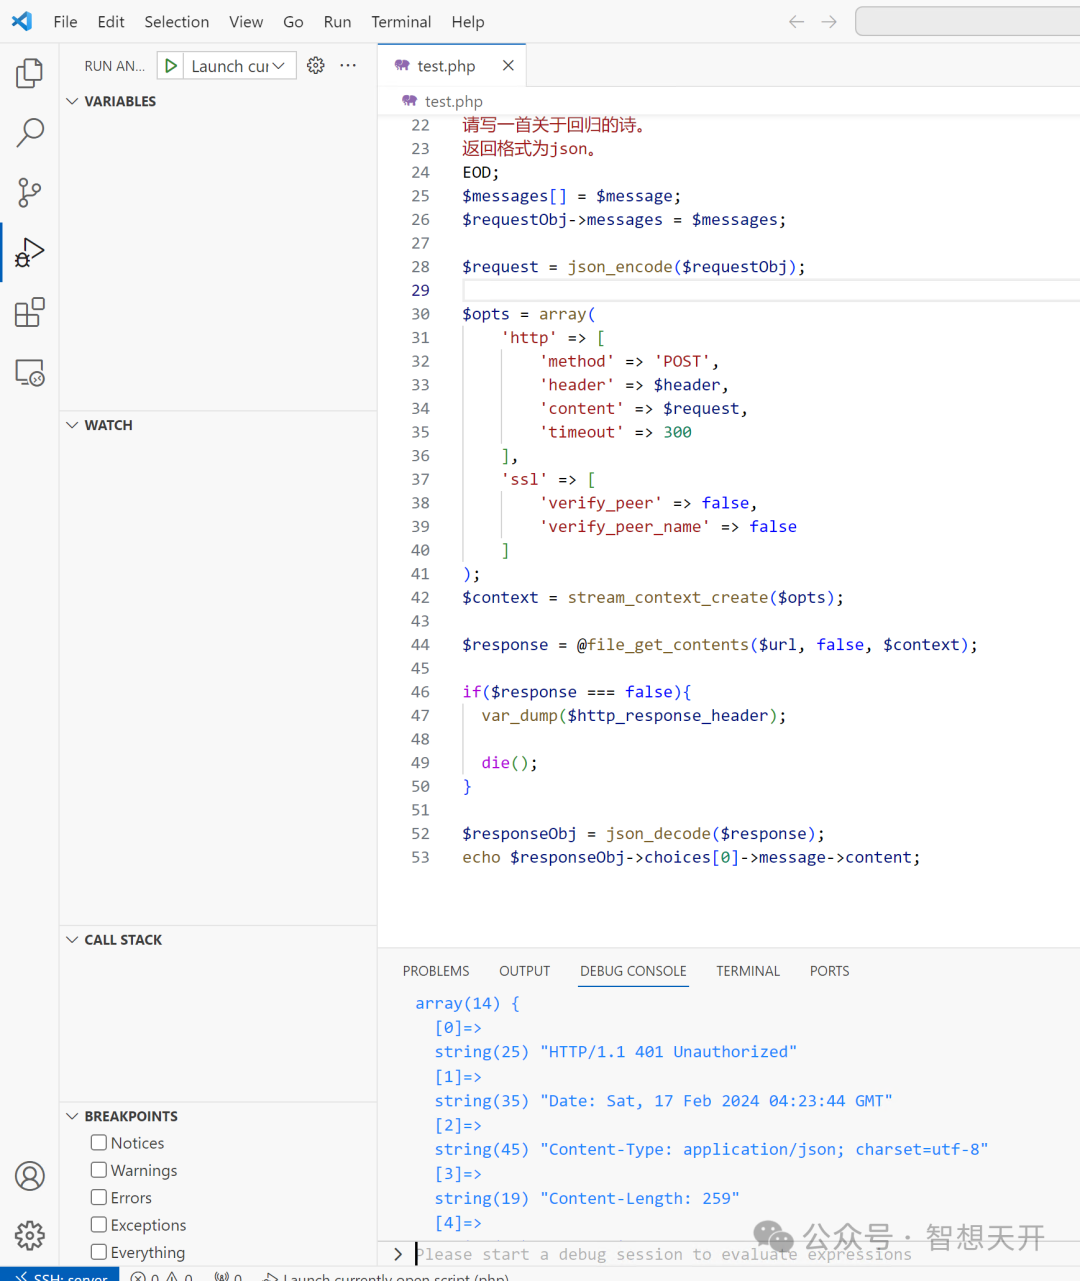
8. Then, we can run the file at the article 'Call OpenAI API by PHP'. Important: we should choose Launch current open script to run the file.
9. We get OpenAI API's returned result as shown. We can do development at our local machine now, VS Code will save and run it on the remote server, and display the result to local machine, automatically.
10. Using the same way, we can add break points to the PHP file and debug it at remote server. This may need some extra setups. We will discuss this on our later articles.
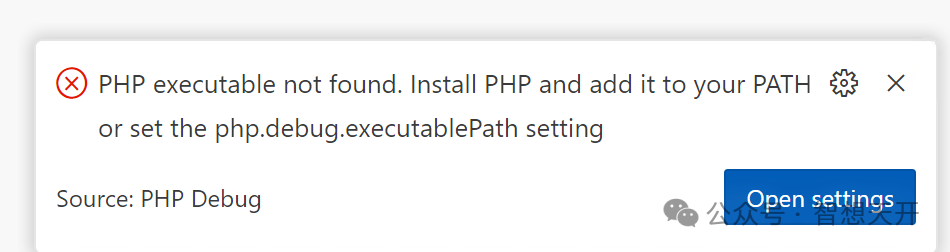
11. If there's no PHP runnable environment on the server, or VS Code cannot find default executable php file, it may get errors as shown:
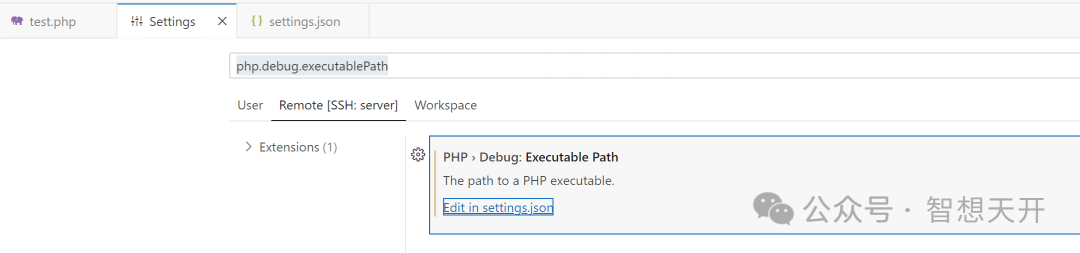
12. We should setup php on the server, or using `which php` command to find where the executable php command is.
13. Then, we open settings.
14. At settings.json, we enter the full executable php path.
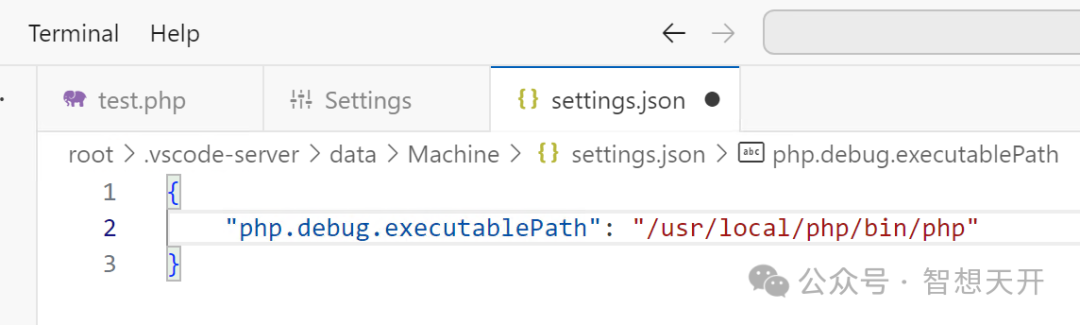
15. Such as: `/usr/local/php/bin/php`, save the settings.json, then we can use VS Code to run php now.
5. Uninstall of development environment
All environment files use by VS Code, are on current logged in user's .vscode-server directory. If you want to uninstall it, just delete the directory is enouth. Sometimes, when VS Code gets new updates, it may conflict with previous versions, and we cannot connect to server using the newly version of VS Code. At such situation, we can delete the .vscode-server directory too, and setup using the previous steps again will get it works.
Follow us at WeChat to get more info